Farm ponds collect rainwater during the monsoon season, which can then be used throughout the year for irrigating crops, especially during dry spells or drought periods.
Improved Irrigation:
The stored water in farm ponds can be pumped for drip irrigation or sprinkler systems, which reduces water wastage and improves water use efficiency. This ensures that crops receive the necessary water even in off-season months when there is a lack of rainfall.
Cost-Effective:
Setting up a farm pond is a relatively low-cost investment that can provide long-term benefits. It eliminates the need for reliance on expensive or unsustainable water sources like groundwater or external water delivery systems.
Sustainability:
Rainwater harvesting through farm ponds is an environmentally friendly solution that contributes to sustainable farming practices. It reduces the dependency on chemical fertilizers and pesticides, as the water stored is free from harmful contaminants.
Promotes Soil Fertility:
Properly managed farm ponds help in maintaining healthy soil by ensuring crops are irrigated at appropriate times. This, in turn, helps in improving soil fertility over time, as the water used is not depleted, leading to better crop yields.
Disaster Resilience:
In regions affected by climate change and frequent droughts, farm ponds can act as a buffer against the worst impacts of water shortages. By storing rainwater, farmers can irrigate their crops when rivers or reservoirs run dry.
How to Set Up a Farm Pond
1. Site Selection
The success of a farm pond begins with choosing the right location. Here’s what to keep in mind:
Topography: Choose low-lying areas where water naturally flows and accumulates, such as near the edges of fields or in depressions. This ensures that water collects easily.
Soil Type: Clayey soils are ideal for constructing ponds as they retain water better, reducing seepage. Sandy or rocky soils might require a lining to minimize water loss.
Catchment Area: The land area surrounding the pond (the catchment area) should be sloped toward the pond to allow rainwater to flow naturally into it. Ideally, the catchment area should be at least two to three times the size of the pond itself to ensure ample water collection.
Distance from Structures: The pond should be placed far enough from buildings or crops to avoid runoff contamination but close enough to provide easy access for irrigation.
2. Designing the Pond
Size and Depth: The size of the pond depends on your irrigation needs, local rainfall, and land area. Typically, ponds range from 5,000 to 50,000 liters in capacity. The depth should be around 3 to 6 meters to ensure enough water storage and to minimize evaporation loss during hot months.
Shape: The shape of the pond can vary but is generally oval or round for maximum volume and stability. Avoid sharp corners, as they can cause erosion over time.
Water Inlet and Outlet: Design an inlet system (like a diversion channel or pipe) to direct rainwater into the pond. Include an outlet for overflow, especially during heavy rains. This ensures that excess water is safely directed away, avoiding flooding or damage.
3. Construction of the Pond
Digging: The pond can be dug using manual labor or machinery (backhoes, excavators). The excavation should be done gradually to prevent erosion. If the soil is porous (e.g., sandy), a liner (such as plastic or geosynthetic material) should be used to prevent seepage.
Bank Reinforcement: The banks of the pond should be reinforced with stone, brick, or vegetation to prevent erosion from water flow. Use a gentle slope for the banks to prevent steep erosion.
Sediment and Filtration: Install a filter or settling basin at the inlet to prevent large debris from entering the pond and blocking water flow.
4. Water Collection System
Rainwater Harvesting: Design your catchment system to capture and direct rainwater into the pond. You can build simple channels or drains to direct runoff water into the pond. During heavy rains, excess water should flow through the overflow outlet to prevent flooding.
Roof Catchment: If possible, consider using nearby rooftops as additional catchment areas for rainwater. Roofs can be fitted with gutters that direct water into pipes leading to the pond.
Maintaining a Farm Pond
1. Water Quality Management
Regular Monitoring: Check the pond periodically for changes in water color, odor, or signs of contamination. Clear, clean water is essential for irrigation and preventing diseases in plants.
Prevent Eutrophication: Avoid excessive nutrients, such as from fertilizers or animal waste, which can lead to algae growth and reduced water quality. You can use aeration methods like floating devices or plants to keep the water oxygenated.
2. Regular Desilting
Over time, silt and debris will accumulate at the bottom of the pond, reducing its capacity and water retention. It’s important to desilt the pond regularly, especially during the dry season, to ensure maximum water storage capacity.
Desilting can be done every 3-5 years, or more frequently depending on the amount of silt deposited. You can use a manual process or machinery to remove the sediment.
3. Bank Erosion Prevention
Vegetative Cover: Plant grass or shrubs along the edges of the pond to prevent soil erosion. Roots will stabilize the banks and prevent water from washing away the soil.
Reinforcement: If necessary, reinforce the banks with stones, or bricks, or even install a geotextile lining along the edges for added stability.
4. Check Water Levels and Irrigation
Monitor Water Levels: Keep track of water levels in the pond regularly. If water levels drop significantly, it could indicate excessive evaporation or poor water retention.
Irrigation Scheduling: Use efficient irrigation methods like drip irrigation or sprinklers to reduce water wastage. Ensure that the water in the pond is used efficiently and not overdrawn, especially during dry months.
Water Conservation: During the dry season, minimize water usage by timing irrigation sessions to avoid evaporation losses. Watering early in the morning or late in the evening reduces evaporation.
5. Maintenance of Inlets and Outlets
Ensure that the inlet channels are clear of debris and that the water enters the pond smoothly. Similarly, check the overflow outlet to prevent blockages, which could lead to flooding or water loss.
Clean drainage pipes periodically to ensure that water flows freely into the pond during rainfall.
Maximizing the Effectiveness of a Farm Pond
Install a gutter system on farm buildings, such as barns, greenhouses, or sheds, to collect rainwater and direct it into the pond. This can substantially increase the volume of rainwater collected during storms.
In larger farms, multiple ponds can be interconnected to distribute water more efficiently, especially during heavy rains. This ensures that no area is overfilled or under-filled.
If needed, groundwater can be used as a supplementary water source during dry spells. Wells or tube wells can be dug close to the pond to draw water when the pond levels are low.
Use the water stored in the pond for non-irrigation purposes as well, such as for livestock or for washing equipment. This ensures that the water is used in an optimal manner.
Benefits of a Well-Maintained Farm Pond
Improved Crop Yield: Consistent access to water ensures that crops grow well, even during drought conditions, resulting in better yields.
Reduced Water Costs: A farm pond reduces reliance on expensive water delivery services or external irrigation sources, cutting costs over the long term.
Climate Resilience: As the climate becomes more unpredictable, having a self-sustained water source makes the farm more resilient to the impacts of climate change and extreme weather conditions.
Conclusion
Once your farm pond is set up, proper maintenance is critical for its longevity and effectiveness.
Rainwater Harvesting Efficiency:
Linking Ponds:
Supplementing with Groundwater:
Recycling and Reusing:
Farm ponds are a game-changer for farmers, especially in drought-prone areas. They help in capturing and storing rainwater for irrigation and can greatly increase a farm’s sustainability and resilience against climate challenges. By carefully designing, constructing, and maintaining your farm pond, you can ensure that your crops have a steady water supply, even during the harshest dry seasons.
With efficient water management, these ponds not only help conserve water but also optimize irrigation and improve crop health, making them a long-term investment in agricultural success.
"This Content Sponsored by Buymote Shopping app
BuyMote E-Shopping Application is One of the Online Shopping App
Now Available on Play Store & App Store (Buymote E-Shopping)
Here’s a step-by-step guide on how to grow your own microgreens at home:
Materials Needed:
Microgreen seeds (available at garden centers or online)
Growing trays (shallow, with drainage holes)
Potting mix (preferably organic)
Spray bottle or watering can
A sunny windowsill or grow lights (if growing indoors)
A clear plastic lid or plastic wrap (optional, to create a mini greenhouse effect)
A small fan (optional, to increase airflow and prevent mold)
Step-by-Step Guide to Growing Microgreens:
1. Choose Your Microgreens
Common choices: Some easy and fast-growing microgreens include arugula, radish, pea shoots, sunflower, mustard, cilantro, basil, and broccoli. Each variety has its own distinct flavor profile, ranging from spicy (radish, mustard) to mild and fresh (pea shoots, sunflower).
Seeds: You can buy microgreen-specific seed mixes, or purchase individual seeds that are suited for microgreens. Just make sure the seeds are labeled for growing microgreens, as they are often specially chosen for their ability to grow quickly.
2. Prepare the Growing Tray
Tray size: Use a shallow tray (about 1-2 inches deep) to ensure that there is enough space for the roots to develop, but you don’t need too much depth since microgreens have relatively shallow roots.
Add potting mix: Fill the tray with a fine, well-draining potting mix, leaving about half an inch of space from the top of the tray. Microgreens grow best in light, fluffy soil, so avoid heavy garden soil that can be too dense.
Moisten the soil: Lightly water the soil to ensure it’s moist but not soggy. A spray bottle works well for this step to avoid over-watering.
3. Plant the Seeds
Spread the seeds: Scatter the seeds evenly over the surface of the soil. You don’t need to space them too far apart because microgreens are usually harvested before they outgrow each other. You can plant the seeds in a dense layer for a full, lush harvest.
Press the seeds down lightly: Gently press down on the seeds using a piece of cardboard or a flat board to ensure good seed-to-soil contact. This is especially important for tiny seeds.
4. Create Ideal Growing Conditions
Light: Microgreens need at least 4-6 hours of light per day. If you’re growing them indoors, place the tray on a sunny windowsill. Alternatively, use a grow light for consistent light. If you're growing them outside, a partially shaded spot works well.
Temperature: Microgreens thrive in temperatures between 60°F and 75°F (15°C - 24°C). Keep the tray in a warm, well-lit location.
Humidity: Covering the tray with a clear plastic lid or plastic wrap (while ensuring some airflow) can help maintain humidity during germination, creating a mini greenhouse effect. Once the seeds begin to sprout, remove the cover.
5. Watering
Watering: Keep the soil consistently moist but not waterlogged. Water the seeds gently with a spray bottle or watering can. Be careful not to disturb the seeds.
Monitor closely: Microgreens grow quickly, and overwatering can lead to mold growth. It's important to water lightly but regularly, especially if you're growing them indoors with dry air.
6. Germination and Growth
Germination time: Most microgreens will begin to sprout in about 3-7 days, depending on the variety. For example, radishes and sunflowers tend to germinate quickly, while cilantro and parsley may take a little longer.
Light exposure: Once the seeds have sprouted, they’ll need direct light to grow properly. If you were using a plastic cover, you can remove it once you see sprouts.
Growth stage: After about 7-10 days, the seedlings will grow to the microgreen stage, where they are ready to be harvested. Their leaves will be vibrant and full of flavor.
7. Harvesting Microgreens
When to harvest: Microgreens are typically ready to harvest in 7-21 days, depending on the variety. The leaves should be bright green and well-formed, but they haven’t yet started to develop mature leaves. It's best to harvest them while they're still tender and young.
How to harvest: Use scissors or a sharp knife to cut the microgreens just above the soil line. Make sure to cut them all at once to get a clean harvest. Don’t pull them out by the roots.
Harvest in stages: If you’re growing a variety of microgreens in the same tray, you can harvest different patches at different times, as they will mature at slightly different rates.
8. Enjoy Your Microgreens
Use immediately: Microgreens are best eaten fresh. They add a burst of flavor and nutrition to dishes like salads, sandwiches, smoothies, wraps, and even as a garnish for soups or stir-fries.
Storage: If you can’t use all of your microgreens at once, store them in a sealed container in the refrigerator for 2-3 days. They are very delicate, so handle them gently.
Tips for Success:
Air circulation: To avoid mold, ensure good airflow around your microgreens, especially if you’re growing indoors.
Use clean trays: Make sure your growing trays are clean to avoid introducing mold or bacteria.
Rotate your crops: If you plan on growing microgreens regularly, try to rotate different crops to keep your harvest fresh and diverse.
Regrow: Some varieties like pea shoots and sunflower can be regrown after the first harvest, although the second round may not be as large as the first.
Conclusion:
Growing microgreens at home is an easy, cost-effective way to enjoy fresh, nutritious greens year-round. Whether you’re a beginner or an experienced gardener, this simple process allows you to have a variety of vibrant, tasty greens right at your fingertips. Plus, since they grow so quickly, you'll have fresh microgreens ready to eat in just a couple of weeks. Happy growing!
"This Content Sponsored by Genreviews.Online
Genreviews.online is One of the Review Portal Site
இத்தகைய மண் வளத்தைப் பேணிக்காப்பது அனைவரதும் தலையாய கடமையாகும். மண் வளம் பற்றி இக்கட்டுரையில் காண்போம்.
மண் வளத்தின் முக்கியத்துவம்
நலமான மண் வளம்தான் பசுமையான விவசாயத்திற்கு உறுதுணையாக உள்ளது. உலகின் மக்கள் தொகை அதிகரிப்பதற்கு ஏற்ப உணவுத் தேவையும் அதிகரிக்கின்றது.
இதனை நிவர்த்தி செய்வதற்கு உணவு உற்பத்தி இன்றியமையாததாக உள்ளது. இத்தகைய உணவு உற்பத்தியினை நாம் ஏற்படுத்துவதற்கு மண் வளமாக இருப்பது முக்கியமானதாகும்.
தாவர வளர்ச்சிக்கு மண் ஓர் முக்கிய ஊடகமாகவும், உயிரின நலத்திற்கும், ஆரோக்கியமான வாழ்வினை மனிதன் வாழ்வதற்கும் வளமான மண்னே ஆதாரமாகவும் விளங்குகின்றது.
உலக மண்வள நாள்
ஆண்டுதோறும் டிசம்பர்-5 ல் உலக மண் வள தினவிழாவாக கொண்டாடப்பட்டு வருகின்றது. இந்திய மத்திய அரசால் 2015-ம் ஆண்டு முதல், டிசம்பர்-5 மண்வள தினமாகக் கடைப்பிடிக்கப்பட்டு வருகிறது.
மண்வளத்தைப் பேணிக் காப்பது, மண் நலம் மற்றும் அதன் மேலாண்மையின் முக்கியத்துவத்தினை உணர்த்துவதே இந்நாளின் பிரதான நோக்கமாகும்.
மண் மாசடைதல்
மண் மாசுபடுத்தப்படும் போது, சுற்றுச்சூழல் அமைப்பின் சமநிலையில் பாதிப்புகள் ஏற்பட்டு ஏற்றத்தாழ்வுகள் ஏற்படுகின்றன.
தரையில் வீசப்படும் கழிவுகள், எண்ணெய் மற்றும் எரிபொருட் கழிவுகளைக் கொட்டுதல் போன்ற பல காரணங்களினால் மண் அதிகம் மாசுபடுத்துகின்றன.
மண் மாசுபாடு பொதுச்சுகாதார பிரச்சினைகளை ஏற்படுத்துகிறது, விவசாயமும் பெரும் பாதிப்பை சந்திக்கின்றது. எனவே மண் மாசுபாடு தொடர்பாக மக்கள் விழிப்புடன் இருத்தல் வேண்டும்.
மண் வளத்தைப் பாதுகாக்கும் வழிமுறைகள்
மண் வளத்தை பாதுகாக்க, மண்புழு உரம், தொழு உரம், மக்கும் உரங்களை போட வேண்டும். எரு மற்றும் இயற்கை உரங்களை இட்டு, மண்வளத்தை பேணிக் காக்கலாம்.
மண்ணில் உள்ள பல்லுயிரிகளைப் பாதுகாப்பதன் மூலம் மண்ணை உயிர்த்தன்மையுடன் வைத்திருக்கலாம்.
மண்ணின் தன்மை அறிந்து உரமிடுதல் மூலம் மண் வளத்தை காக்க முடியும்.
மண்ணினுள் மக்காத பொருட்கள் குறிப்பாக பிளாஸ்டிக், பாலிதீன் போன்றவை கலப்பதை தவிர்க்க வேண்டும்.
தேவையற்ற ரசாயனங்களை மண்ணில் சேர்வதை தடுக்கும் போது மண் வளம் பாதுகாக்கப்படும்.
முடிவுரை
மண் வளம் நிறைந்த ஊரில் மனிதர்கள் ஆரோக்கியத்துடன் இருப்பார்கள். சங்க இலக்கியத்தில் ‘உணவெனப்படுவது நிலத்தொடு நீரே’ எனக் குறிப்பிடப்பட்டுள்ளது. உணவாய் மாறும் திறன் படைத்தவையே நிலமும், நீரும் என்பது இதன் பொருளாகும்.
அவ்வகையில் மண்வளத்தை பாதுகாப்பது உயிரினும் மேலான கடமை என்பதை உணர்ந்து செயற்படுவதுடன் வளமான மண்ணின் முக்கியத்துவத்தினை அனைவரும் உணர்ந்து நீடித்த நிலையான மண்வள மேம்பாட்டு முறைகளைப் பின்பற்றிட வேண்டும்.
"This Content Sponsored by Genreviews.Online
Genreviews.online is One of the Review Portal Site
மழைநீர் சேகரிப்பு (Rainwater Harvesting): முழுமையான தகவல்கள்
முக்கியத்துவம்
நீரின் பாதுகாப்பு: மழைநீர் சேகரிப்பின் மூலம், நீர் மேலோட்டத்தை கட்டுப்படுத்தலாம். இது நீர் வளங்களை பாதுகாக்க உதவுகிறது.
விவசாயத்திற்கு ஆதரவு: மழை நீரை சேகரிப்பது, விவசாயிகளுக்கு எளிதான மற்றும் மலிவான நீரூபமாகும்.
பசுமை மேம்பாடு: இது நிலத்தை நிலையானதாகவும், மக்களை ஆரோக்கியமாகவும் வைத்திருக்க உதவுகிறது.
பிற்படுத்தப்பட்ட தொழில்நுட்பம்: மழைநீர் சேகரிப்பு முறைகள் சுற்றுப்புற சூழலுக்கு மாசுபாடு குறைக்கின்றன.
மழைநீர் சேகரிப்பு முறைகள்
பூமியில் கிணறுகள்: மழை நீரை சேகரிக்க பூமியில் உள்ள கிணறுகளை உருவாக்குவது.
தண்ணீர் டேங்குகள்: மழை நீரை சேகரிக்க தனியார் மற்றும் பொதுமக்கள் இடங்களில் வாட்டர் டேங்குகள் அமைத்தல்.
குழாய் அமைப்புகள்: கட்டடங்களில் இருந்து மழை நீரை தூண்டிக்கொள்ள குழாய் அமைப்புகளை உருவாக்குவது.
வாயுக்கள்: மழை நீரை சேகரிக்க வடிகால்களை உருவாக்குதல்.
செயல்முறை
மழை நீர் சேகரிப்பு அமைப்பு: மழை நீர் சேகரிக்க ஒரு வடிகால்களை அமைக்க வேண்டும். இது வீட்டின் கூரை மற்றும் சுவர்கள் வழியாக வரும் நீரைச் சேகரிக்கும்.
பருத்திகள்: சேகரிக்கப்பட்ட நீரை பருத்திகளில் சேமிக்கவும், இவை ஆழமான மற்றும் சுத்தமானதாக இருக்க வேண்டும்.
சுத்திகரிப்பு: சேகரிக்கப்பட்ட நீரை சுத்தம் செய்ய, பிளாஸ்டிக் வடிகால்களை மற்றும் பல்வேறு வடிகால்களை பயன்படுத்தலாம்.
நிறைவு மற்றும் பயன்பாடு: கிணறு அல்லது டேங்கில் நீரை நிறைவு செய்து, அவற்றை குடிநீர் அல்லது விவசாயத்திற்காகப் பயன்படுத்தலாம்.
சவால்கள்
புகழ்ச்சி: மழைநீர் சேகரிப்பில் மக்கள் ஈடுபடாமல் இருக்கலாம், இது குறைந்த பயன்பாட்டிற்கு வழிவகுக்கும்.
பராமரிப்பு: சேகரிப்பு மற்றும் சுத்திகரிப்பு முறைகள் சிக்கலானவையாக இருக்கலாம், மேலும் பராமரிப்பு செலவுகள் அதிகமாக இருக்கலாம்.
மழை கஷ்டம்: மழை வருவிக்குப் பெரிய இடைவெளியால், நீர் சேகரிப்பு சிக்கல் ஏற்படும்.
முடிவு
மழைநீர் சேகரிப்பு, நீர் பாதுகாப்பு மற்றும் சூழலியல் நிலைத்தன்மையை மேம்படுத்துவதில் முக்கிய பங்கு வகிக்கின்றது. மக்கள் இதை சரியாக செயல்படுத்தியால், நீர் பற்றாக்குறையை குறைத்துக்கொள்ள மற்றும் நிலத்திற்கான நீர் மேலோட்டத்தை மேம்படுத்தவும் உதவும். இந்த முறைகள், இடத்தில் உள்ள மக்கள் மற்றும் சமுதாயங்களுக்கு நீர் வளங்களை வழங்குவதில் முக்கிய பங்கு வகிக்கின்றன. மழைநீர் சேகரிப்பு, ஒரு நிலையான மற்றும் பசுமையான எதிர்காலத்திற்கான அடித்தளம் ஆக அமைய வேண்டும்.
"This Content Sponsored by Genreviews.Online
Genreviews.online is One of the Review Portal Site
Regardless of Indian agriculture’s contribution to the GDP, our country is yet to enhance productivity and efficiency in the sector to reach the highest potential. Several dimensions and concerns need to be identified, supported, and equipped with resolutions. Unsuitable methods for monitoring crops, water irrigation, using pesticides, and many other necessary farming activities are currently adopted. Resources are inadequate, not allotted according to weather conditions, or have not been exploited to their maximum potential—a reason why there is often a decline in the Return on Investment (ROI).
These hindrances have granted multiple opportunities for growth and development in the world of technology. The influence of technology in the agricultural sector has been invariably positive since its commencement. As governments and businesses across the country recognized the significance of food security and the consequences of environmental degradation, pollution, and water scarcity, the urgency to overcome certain obstacles arose.
WHY ADOPT AGRICULTURAL DRONES?
Drone technology has gotten most of the recognition in the industry because of its diversity and considered the future for the agrarian community. The military initially used them. However, other sectors quickly embraced unmanned aerial vehicles (UAVs) when they learned about its widespread applications.
How can drones support Indian agriculture? Drones don’t merely enhance overall performance but also encourage farmers to solve other assorted barriers and receive plenty of benefits through precision agriculture. With the market for agricultural drones reaching a whopping $1.3 billion, UAVs (unmanned aerial vehicles) fill the gap of human error and inefficiency by traditional farming methods. The purpose of adopting drone technology is to exclude any guesswork or ambiguity and instead focus on accurate and reliable information.
External factors like weather, soil conditions, and temperature play a critical role in farming. Agriculture drone empowers the farmer to adapt to specific environments and make mindful choices accordingly. The gained data helps regulate crop health, crop treatment, crop scouting, irrigation, and carry out field soil analysis and crop damage assessments. The drone survey helps boost crop yields and minimize time and expenses.
According to experts, the predicted world population will be 9 billion by 2050. Agricultural consumption is also said to increase simultaneously by nearly 70%. Drone technology, equipped with artificial intelligence (AI), machine learning (ML), and remote sensing features, are rising in demand because of its advantages. The central government has acknowledged the importance of unmanned aerial vehicles (UAVs), machine learning, and artificial intelligence with their ‘Digital Sky Platform’ online. Drone startups in India have used this opportunity to accomplish better technological capacities.
HOW DOES DRONE TECHNOLOGY WORK?
DRONE TECHNOLOGY
Only after complete recognition of drones characteristics can one gain in-depth knowledge about agriculture drones. Typically, drones include a navigation system, GPS, multiple sensors, high-quality cameras, programmable controllers, and tools for autonomous drones. The DJI is one such familiar drone utilized by the industry. Most farmers currently use satellite imagery as an introductory guide for farm management. Furnished with modern technology, Unmanned aerial vehicles (UAVs) can get more precise data than satellites for precision agriculture. They then process the data captured into agri-tech software to produce beneficial knowledge
Capturing data from agriculture drone takes place as in the following stages
Analyzing the area: This identifies the territory being tested. Therefore, the first step includes establishing a boundary, analyses of the area, and then finally, uploading the technical GPS information into the drone’s navigation system.
DATA PROCESSING
Using Autonomous Drones: Since Unmanned aerial vehicles (UAVs) are independent, they enter flight patterns into their already established system to collect required data.
Uploading the data: After capturing all the required data through sensors such as the multispectral sensor/RGB sensor, it is processed through numerous software for further analysis and interpretation.
Output: After collecting the data, they format it so that farmers can understand the data with no hassle, bringing them a step closer to precision farming. 3D mapping or Photogrammetry are popular methods to display extensive data collected.
Drone technology quickly reestablishes traditional agrarian practices and is subsequently accomplishing them as follows
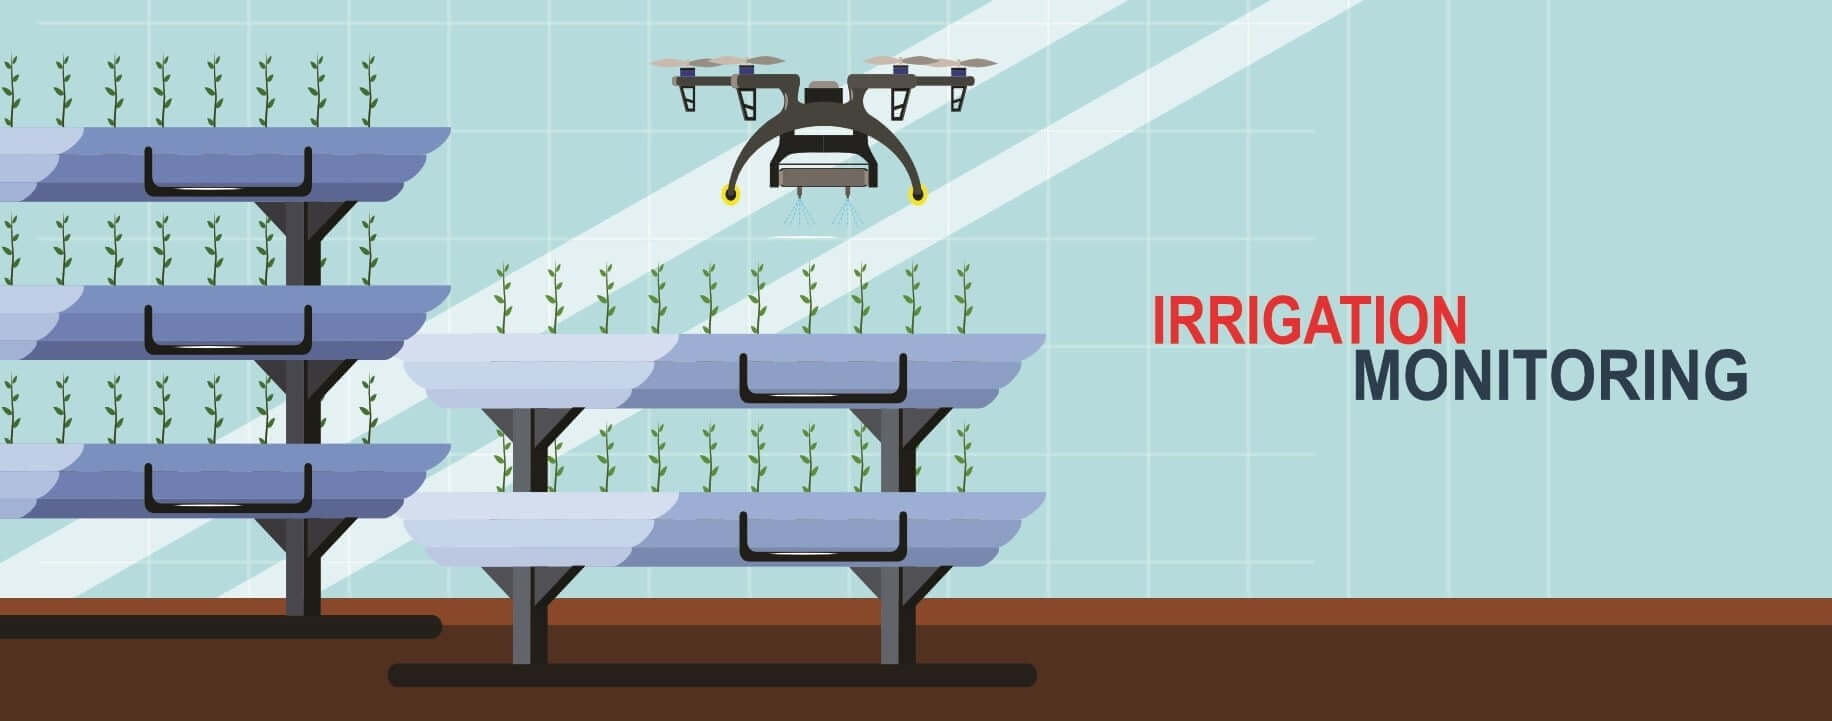
Irrigation Monitoring:
IRRIGATION MONITORING
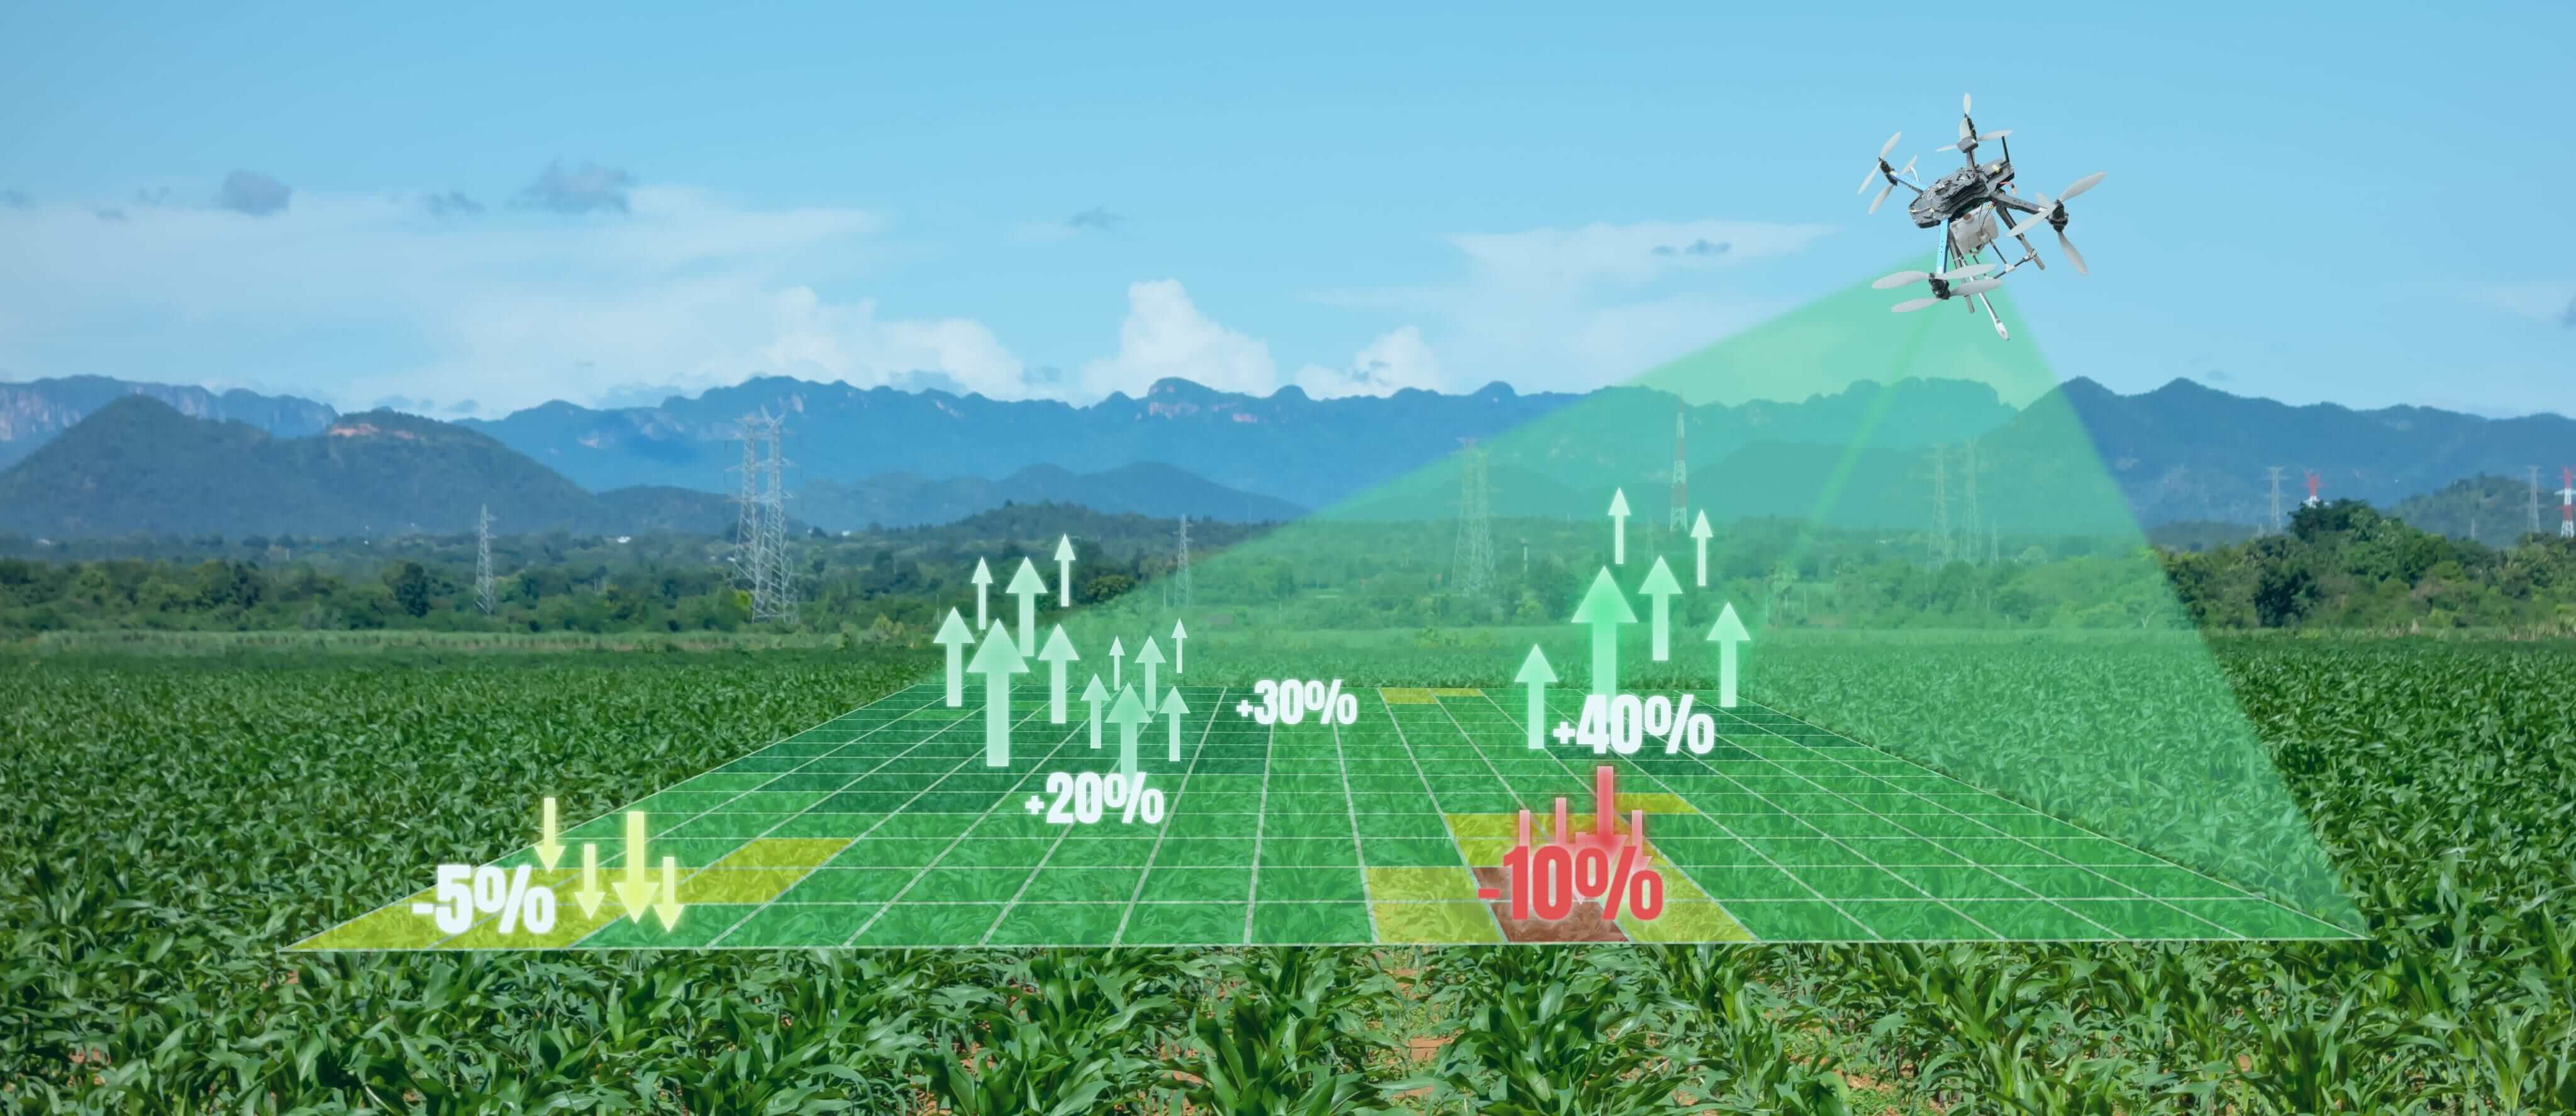
Drones, including hyperspectral, thermal, or multispectral sensors, recognize areas that are too dry or need improvement by the farmer. Drone survey helps improve water efficiency and disclose potential pooling/leaks in irrigation by providing Irrigation monitoring yields calculations of the vegetation index to help realize the health of crops and emitted heat/energy.
Crop Health Monitoring and Surveillance
It is crucial to track the health of the vegetation and spot bacterial/fungal plagues in the early stages. Agriculture drones can see which plants reflect different amounts of green light and Near-infrared spectroscopy (NIRS) light. This data helps produce multispectral images to track crop health. Quick monitoring and discoveries of any defects can help save crops. In circumstances of crop failure, the farmer can also document the damages for accurate insurance claims.
Crop Damage Assessment
CROP DAMAGE ASSESSMENT
Agricultural drones fitted along with multispectral sensors and RGB sensors also detect field areas inflicted by weeds, infections, and pests. According to this data, the exact amounts of chemicals needed to fight these infestations are known, and this helps diminish the costs inflicted by the farmer.
Field Soil Analysis
The drone survey allows farmers to obtain information about their land’s soil conditions. Multispectral sensors allow seizing data useful for seed planting patterns, thorough field soil analysis, irrigation, and nitrogen-level management. Precise Photogrammetry/ 3D mapping permits farmers to analyze their soil conditions thoroughly.
Planting
Drone startups in India have invented drone-planting systems that allow drones to shoot pods, their seeds, and crucial nutrients into the soil. This technology doesn’t only reduce costs by almost 85% but also increases consistency and efficiency.
Agricultural spraying
PESTICIDES SPRAYING
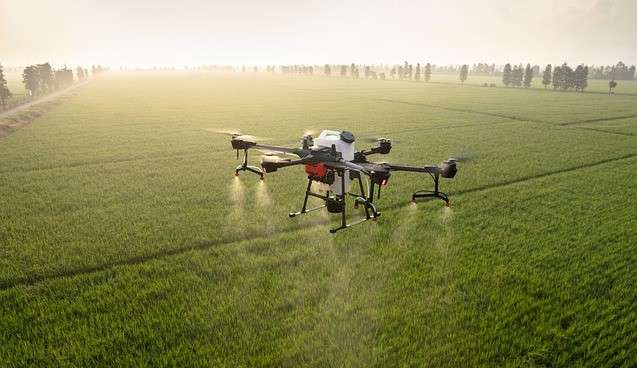
Through drone crop spraying, human contact with such harmful chemicals is limited. Agri-drones can carry out this task much quicker than vehicles/airplanes. Drones with RGB sensors and multispectral sensors can precisely identify and treat problematic areas. Professionals say that aerial spraying is five times faster with drones when compared to other methods.
Livestock tracking
The drone survey allows the farmers not to keep track of their crops only but also monitor the movements of their cattle. Thermal sensor technology helps find lost animals and detect an injury or sickness. Drones can carry out this function favorably, and this adds comprehensively to the production of vegetation.
BENEFITS OF DRONE TECHNOLOGY
As innovators introduce new technologies, their commercial uses increase day by day. The government has been easing restrictions for drone usage and is supporting startups to come up with novel ideas. As drone surveys become more common, they also become more cost-effective. In agriculture, they have a plethora of advantages. Some are as follows:
Enhanced Production – The farmer can improve production capabilities through comprehensive irrigation planning, adequate monitoring of crop health, increased knowledge about soil health, and adaptation to environmental changes.
Effective and Adaptive Techniques – Drone usage results in regular updates to farmers about their crops and helps develop strengthened farming techniques. They can adapt to weather conditions and allocate resources without any wastage.
Greater safety of farmers – It is safer and more convenient for farmers to use drones to spray pesticides in terrains challenging to reach, infected areas, taller crops, and power lines. It also helps farmers prevent spraying the crops, which leads to less pollution and chemicals in the soil.
10x faster data for quick decision-making – Drone surveys back farmers with accurate data processing that encourages them to make quick and mindful decisions without second-guessing, allowing farmers to save the time invested in crop scouting. Various sensors of the drone enable capturing and analyzing data from the entire field. The data can focus on problematic areas such as infected crops/unhealthy crops, different colored crops, moisture levels, etc. The drone can be fixed with several sensors for other crops, allowing a more accurate and diverse crop management system.
Less wastage of resources – Agri-drones enables optimum usage of all resources such as fertilizer, water, seeds, and pesticides.
99% Accuracy rate – The drone survey helps farmers calculate the precise land size, segment the various crops, and indulge in soil mapping.
Useful for Insurance claims – Farmers use the data captured through drones to claim crop insurance in case of any damages. They even calculate risks/losses associated with the land while being insured.
Evidence for insurance companies – Agricultural insurance sectors use Agri-drones for efficient and trustworthy data. They capture the damages that have occurred for the right estimation of monetary payback to the farmers.
LOCUST SWARM
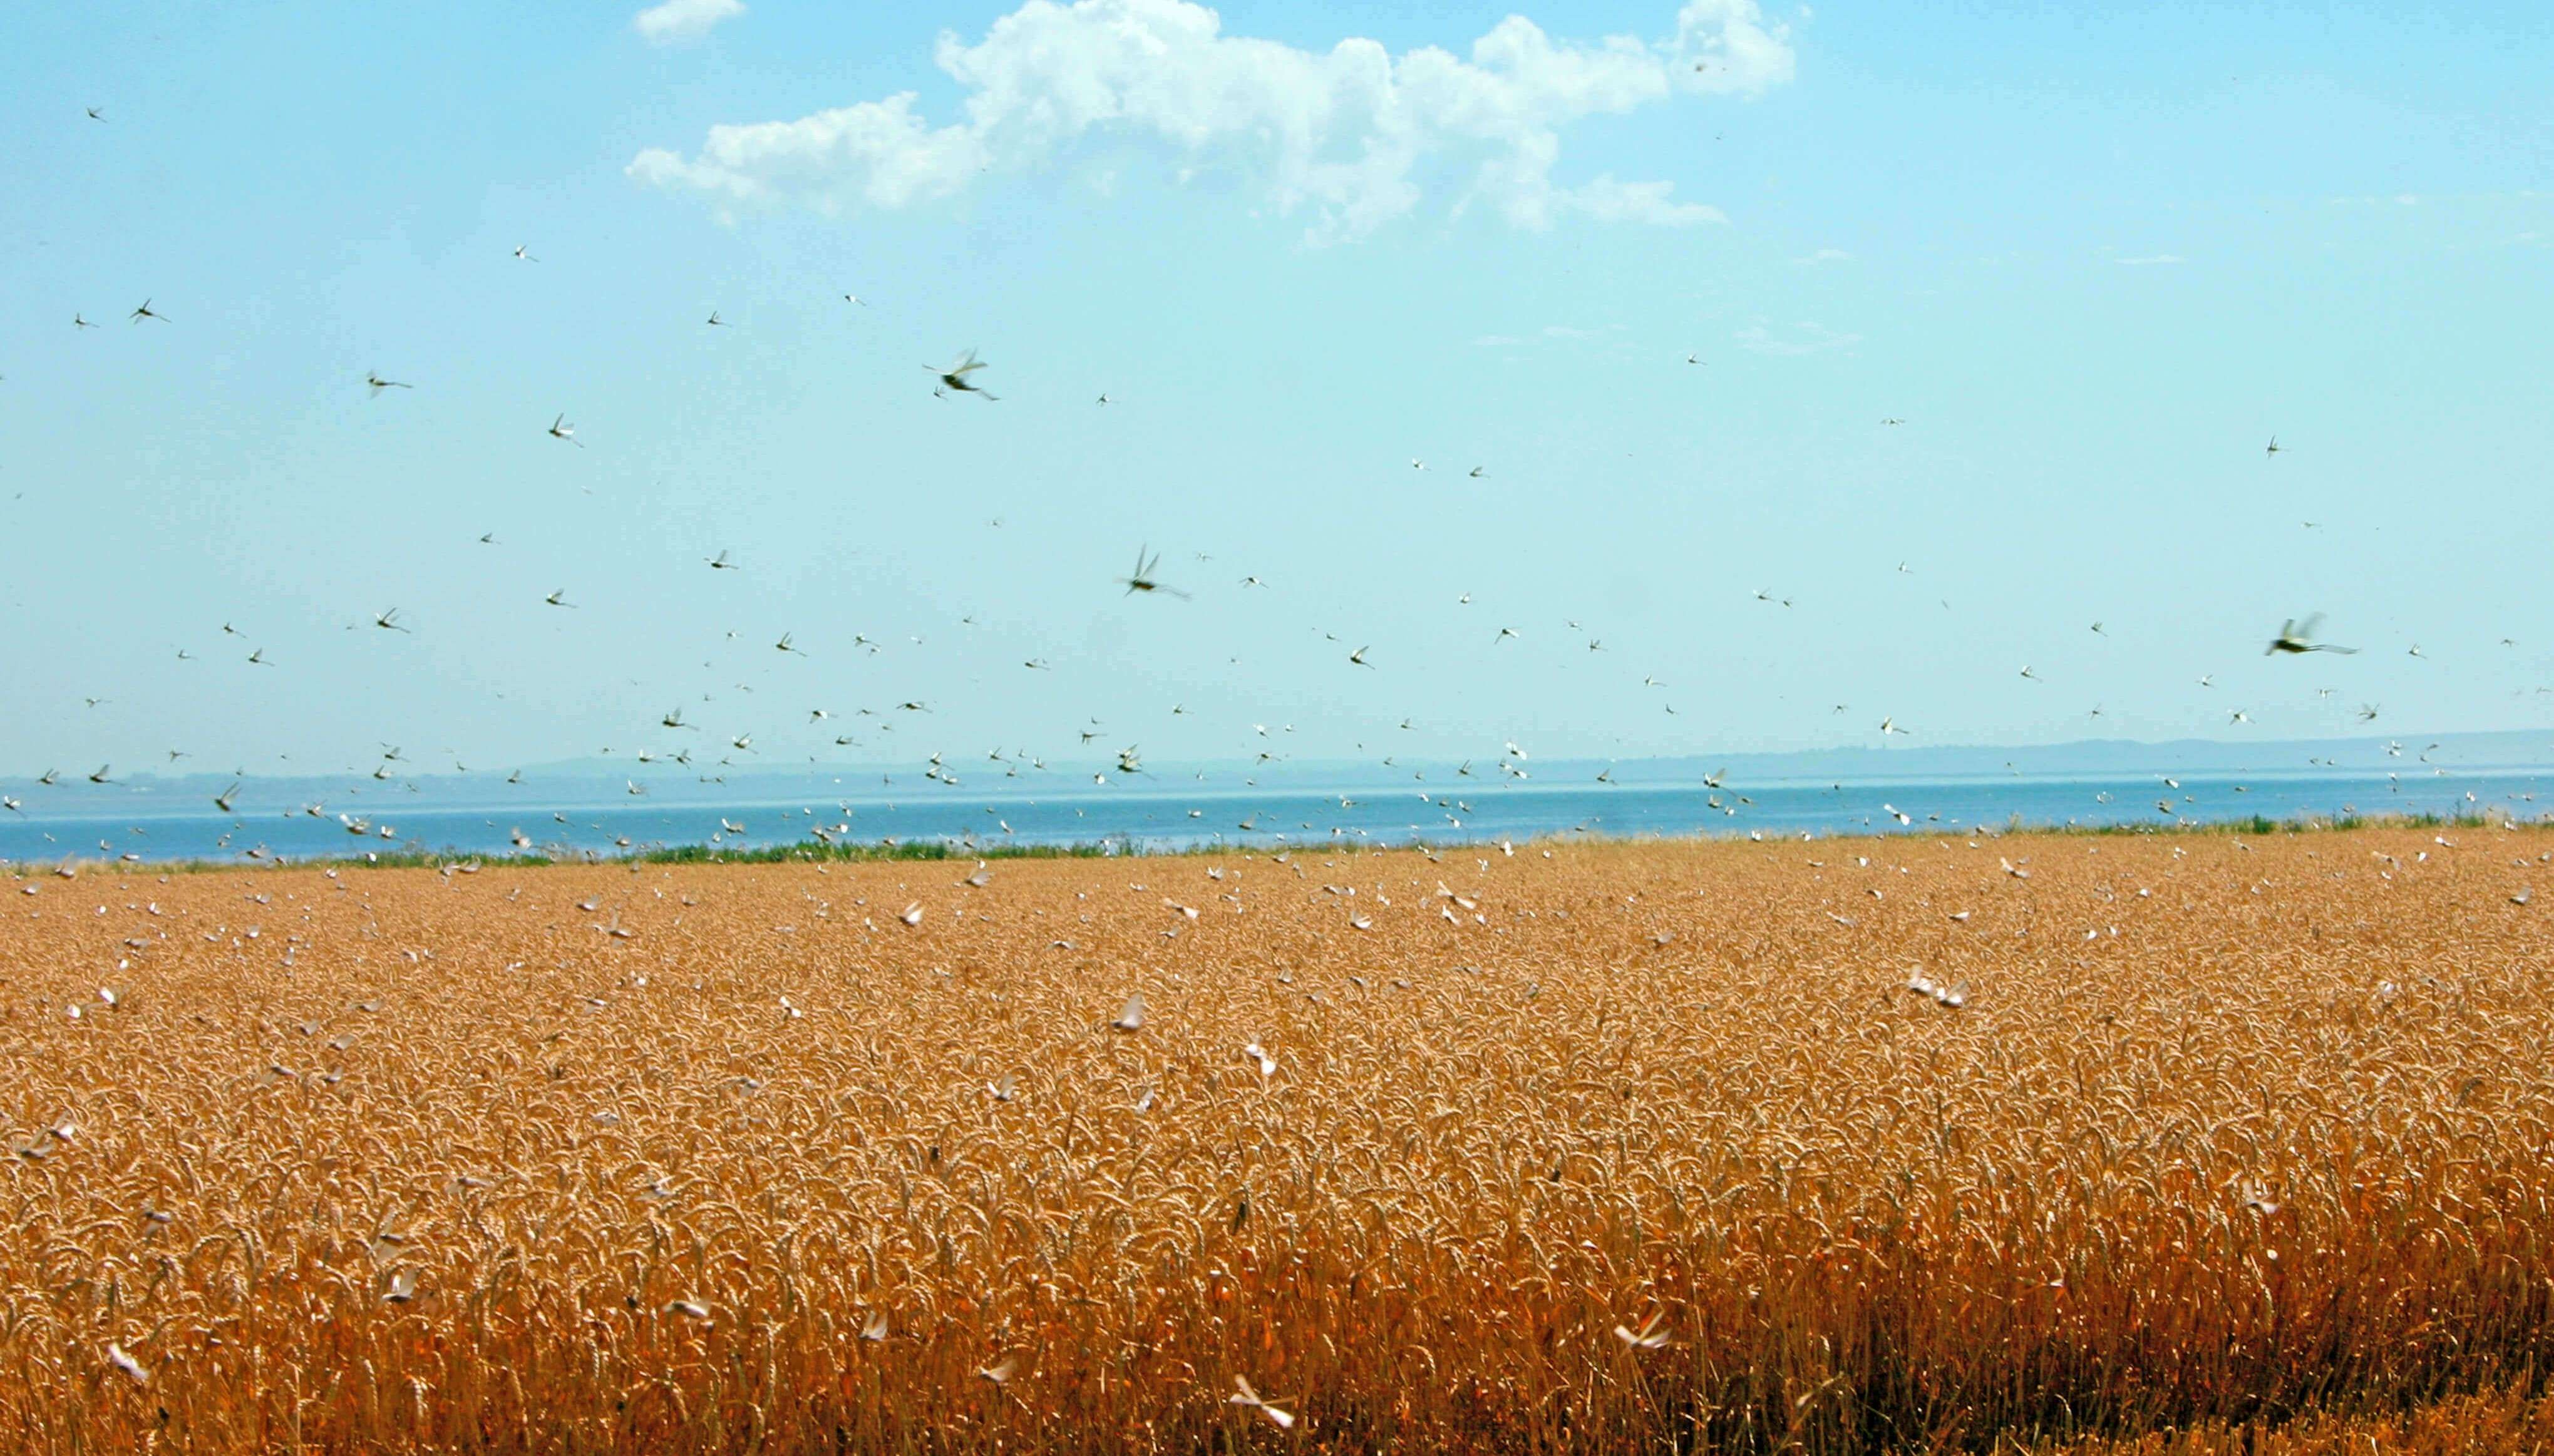
Locust swarms are known to feed on crops, trees, and other types of plants. This feeding can destroy crops planted, causing famine and deprivation in societies that solely rely on these crops for survival. In recent times, swarms of locusts have invaded several areas in India, especially Rajasthan. With nearly 90,000 Hectares of land affected across 20 districts, these growing swarms are threatening to amplify into an agrarian disaster.
Most nations battling locust swarms rely significantly on organophosphate chemicals. These are utilized in little concentrated lots by vehicle-mounted and aerial sprayers. Rajasthan has stationed drones to carry out the spraying efficiently. Drones can diffuse pesticides on approximately 2.5-acres in merely 15 minutes. Using drones to combat the locust swarms is an immediate, secure, and practical approach.
FINAL THOUGHTS
As mentioned before, agricultural drone technology is undoubtedly the future of the Indian agrarian community. It can transform traditional farming methods in uncountable ways. Even though this technology is more complex to be familiar with, it will yield its results in no time once learned.
Farmers must understand the entire process. Determination of goals, creating an equilibrium in the drone and software utilized, and being familiar with the principles of using such technology will stand as a challenge. The farmers will inevitably need comprehensive training or partnerships with third-party experts in the drone industry for the acquisition of reliable data. Drones have changed the course of obtaining data in almost every type of industry, and will only deem to become bigger and better in the coming years.
"This Content Sponsored by Genreviews.Online
Genreviews.online is One of the Review Portal Site
Azolla consists of small, lobed leaves that float on the water's surface, forming dense mats. Each leaf can be up to 2.5 cm long, and the plant reproduces both vegetatively and through spores.
Symbiosis:
One of the most remarkable aspects of Azolla is its symbiotic relationship with the cyanobacterium Anabaena. This association allows Azolla to fix atmospheric nitrogen, making it an excellent natural fertilizer.
Habitat and Distribution
Azolla is commonly found in freshwater bodies such as ponds, lakes, and rice paddies. It prefers shallow waters with plenty of sunlight and can grow in a variety of substrates. It is prevalent in regions like Southeast Asia, Africa, and parts of North America.
Ecological Importance
Nutrient Cycling:
Azolla plays a vital role in nutrient cycling within aquatic ecosystems, particularly in improving water quality by absorbing excess nutrients.
Habitat Formation:
The dense mats formed by Azolla provide habitat and shelter for various aquatic organisms, contributing to biodiversity.
Carbon Sequestration:
By absorbing carbon dioxide during photosynthesis, Azolla helps mitigate climate change impacts.
Agricultural Applications
Azolla is increasingly recognized for its agricultural benefits:
Green Manure:
Farmers use Azolla as a green manure to enhance soil fertility. Its high nitrogen content improves crop yields, especially in rice cultivation.
Pest Control:
The growth of Azolla can suppress the development of certain pests and weeds, reducing the need for chemical herbicides.
Livestock Feed:
Azolla can be harvested and used as a nutritious feed for livestock due to its high protein content.
Challenges and Management
Despite its benefits, Azolla can become invasive, particularly in non-native habitats, leading to ecological imbalances. Effective management strategies, such as controlled cultivation and regular monitoring, are essential to prevent its spread while maximizing its benefits.
Conclusion
Azolla is a remarkable plant with diverse ecological and agricultural significance. Its ability to fix nitrogen, improve soil fertility, and support aquatic ecosystems makes it a valuable resource. By understanding and managing Azolla effectively, we can harness its potential for sustainable agriculture and environmental health.
"This Content Sponsored by Genreviews.Online
Genreviews.online is One of the Review Portal Site
தலைப்பு: மாடித்தோட்டம்: நகர்ப்புற வாழ்க்கையில் பசுமைத் துளி
உட்பிரிவுகள்:
மாடித்தோட்டம் என்றால் என்ன?
வீட்டின் மாடியில் பல்வேறு வகையான தாவரங்களை வளர்ப்பது.
குறைந்த இடத்தில் அதிக பயன்.
நகர்ப்புற வாழ்க்கையில் இயற்கையை நெருங்க அனுமதிக்கிறது.
மாடித்தோட்டத்தின் நன்மைகள்:
சுற்றுச்சூழல் நன்மைகள்:
காற்றின் தரத்தை மேம்படுத்துகிறது.
வெப்பநிலையை குறைக்கிறது.
மழைநீரை சேமிக்கிறது.
உயிரினங்களுக்கு வாழ்விடத்தை அளிக்கிறது.
உடல் நல நன்மைகள்:
சுத்தமான மற்றும் புதிய காய்கறிகள் கிடைக்கிறது.
மன அழுத்தத்தை குறைக்கிறது.
உடல் உழைப்பு கிடைக்கிறது.
பொருளாதார நன்மைகள்:
வீட்டு செலவை குறைக்கிறது.
கூடுதல் வருமானம் ஈட்ட வாய்ப்பு.
மாடித்தோட்டம் அமைக்கத் தேவையான பொருட்கள்:
பெட்டிகள் அல்லது தொட்டிகள்
மண்
உரம்
விதைகள் அல்லது நாற்றுகள்
நீர்ப்பாசன அமைப்பு
சூரிய ஒளி
மாடித்தோட்டம் அமைக்கும் முறைகள்:
இடத்தை திட்டமிடுதல்
தொட்டிகளை ஏற்பாடு செய்தல்
மண் மற்றும் உரத்தை நிரப்புதல்
விதைகளை விதைத்தல் அல்லது நாற்றுகளை நடவு செய்தல்
நீர்ப்பாசனம் செய்தல்
பராமரிப்பு
மாடித்தோட்டத்தில் வளர்க்கக்கூடிய தாவரங்கள்:
காய்கறிகள்: தக்காளி, மிளகாய், வெண்டை, கீரை வகைகள்
பழங்கள்: ஸ்ட்ராபெரி, எலுமிச்சை, கொத்தமல்லி
மூலிகைகள்: புதினா, கொத்தமல்லி, கறிவேப்பிலை
பூக்கள்: ரோஜா, மல்லிகை, செம்பருத்தி
மாடித்தோட்டம் தொடர்பான பிரச்சனைகள் மற்றும் தீர்வுகள்:
பூச்சிகள் மற்றும் நோய்கள்
போதுமான சூரிய ஒளி இல்லாதது
நீர் வடியாத பிரச்சனை
மண் அரிப்பு
மாடித்தோட்டம் தொடர்பான அரசு திட்டங்கள்:
மாடித்தோட்டத்தை ஊக்குவிக்கும் திட்டங்கள்
விதைகள் மற்றும் உரம் வழங்கும் திட்டங்கள்
பயிற்சி வகுப்புகள்
மாடித்தோட்டம் தொடர்பான ஆலோசனை:
தொடக்கநிலையாளர்களுக்கான குறிப்புகள்
அனுபவமிக்கவர்களுக்கான ஆலோசனைகள்
சமூக வலைதளங்கள் மற்றும் குழுக்கள்
முடிவுரை:
மாடித்தோட்டம் என்பது நகர்ப்புற வாழ்வில் இயற்கையை நெருங்கி பழகுவதற்கான ஒரு சிறந்த வழி. இது சுற்றுச்சூழல், உடல்நலம் மற்றும் பொருளாதாரம் ஆகிய அனைத்து அம்சங்களிலும் நன்மை பயக்கும். எனவே, ஒவ்வொரு வீட்டிலும் மாடித்தோட்டத்தை அமைப்பது நமது கடமை.
குறிப்பு: மேற்கண்ட தகவல்கள் பொதுவானவை. மாடித்தோட்டம் தொடர்பான மேலும் தகவல்களை தோட்டக்கலைத்துறை வல்லுநர்களிடம் கேட்டு அறிந்து கொள்ளலாம்.
கூடுதல் தகவல்களுக்கான இணைப்புகள்:
தமிழ்நாடு வேளாண்மைப் பல்கலைக்கழகம்
இந்திய வேளாண் ஆராய்ச்சி கவுன்சில்
தோட்டக்கலைத்துறை தொடர்பான வலைப்பதிவுகள் மற்றும் யூடியூப் சேனல்கள்
இந்த பதிவு உங்களுக்கு பயனுள்ளதாக இருந்தால், உங்கள் நண்பர்களுடன் பகிர்ந்து கொள்ளுங்கள்.
தொடர்புடைய பதிவுகள்:
வீட்டு தோட்டம் அமைக்கும் முறைகள்
மூலிகை தோட்டம் அமைக்கும் முறைகள்
பழ மரங்கள் வளர்ப்பது எப்படி
காய்கறி தோட்டம் அமைப்பது எப்படி
"This Content Sponsored by Genreviews.Online
Genreviews.online is One of the Review Portal Site


.jpg)